 SBM LabsTCG
Adjust the lines yourself
Think a line is in the wrong place? Move it. Your lines then decide your own result (nobody else's), and they help us make the measuring better.
Open the editor
Click Adjust lines under a side's picture in the panel. The editor opens in a new tab.
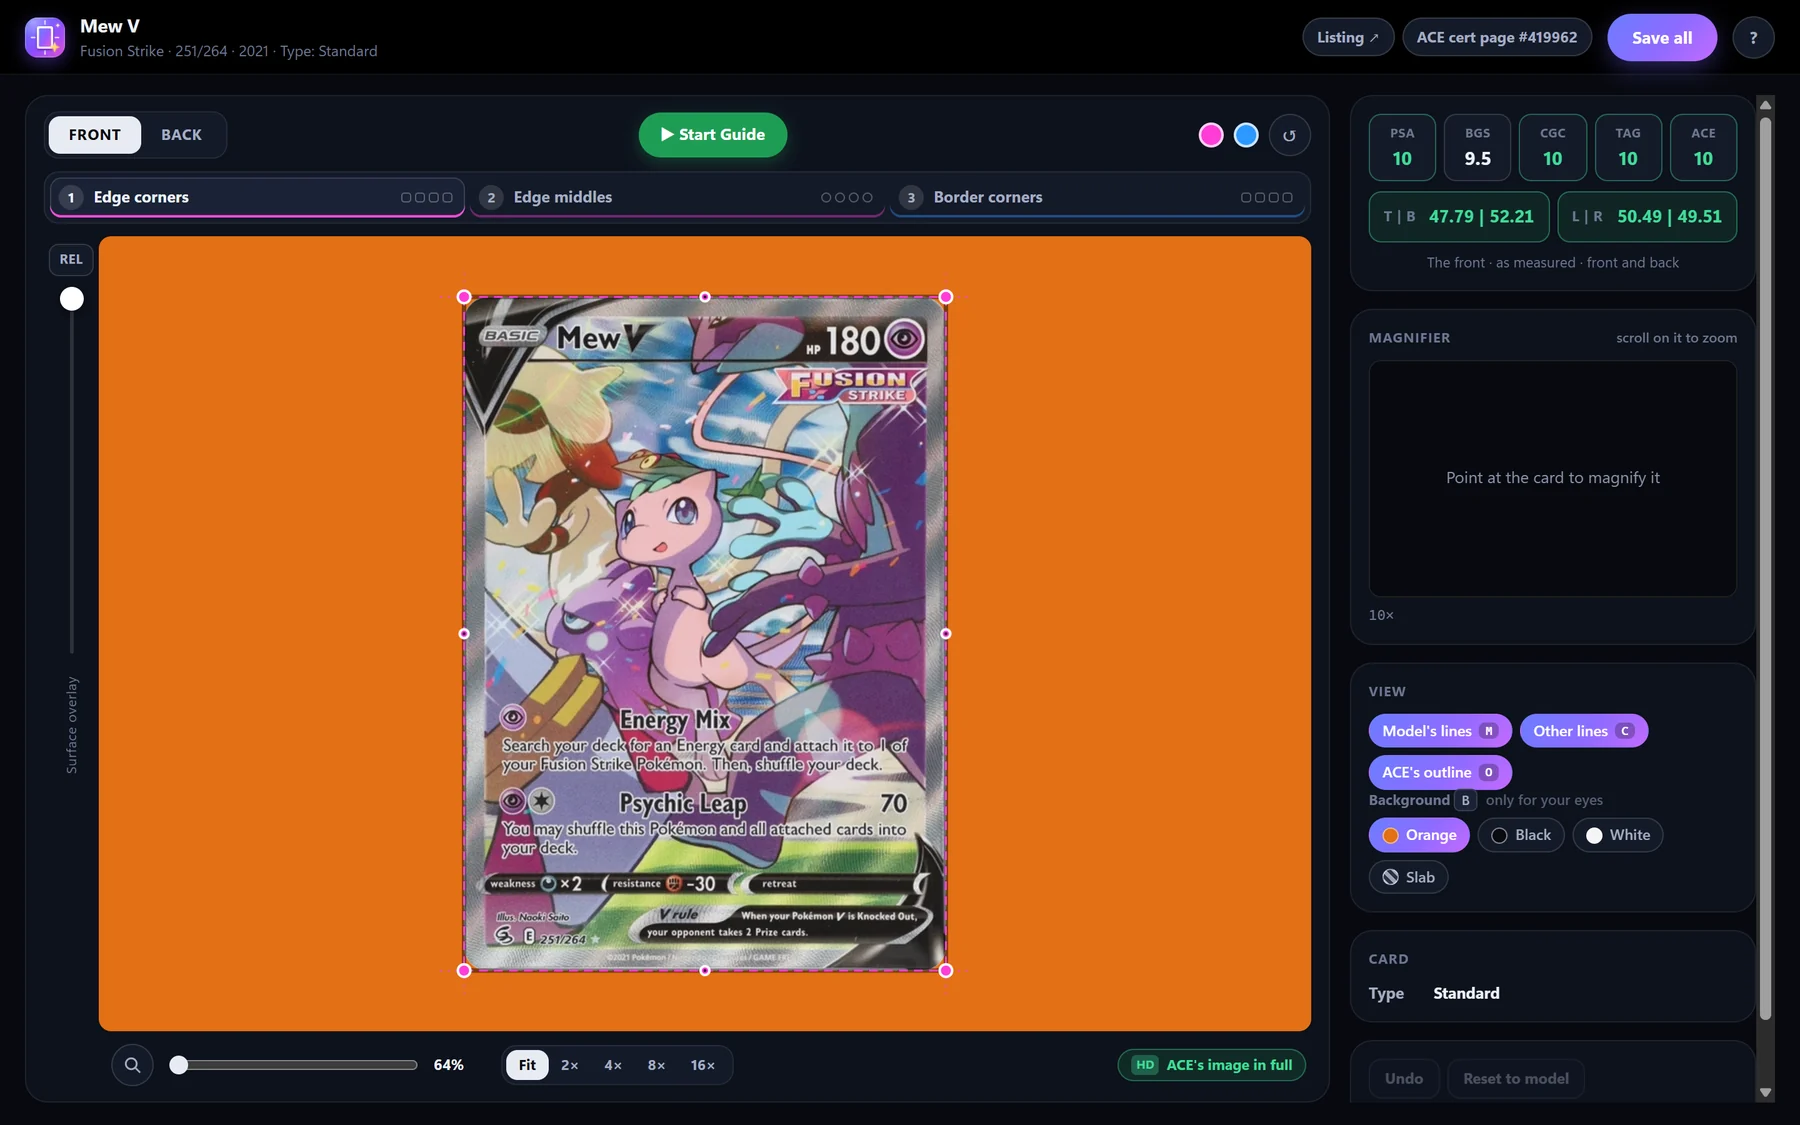
The lines
The pink line is the card's edge. The blue line is the inside edge of the printed border.
The stages along the top go round the card's edge (its corners, then the middle of each side), then the border's corners.
Go round with Start Guide
Click Start Guide. It zooms in on each point in turn. Drag the dot onto the exact spot, or use the arrow keys for tiny steps. Click Next for the next point.
Once you've seen all four points, Save turns green: click it to finish that stage.
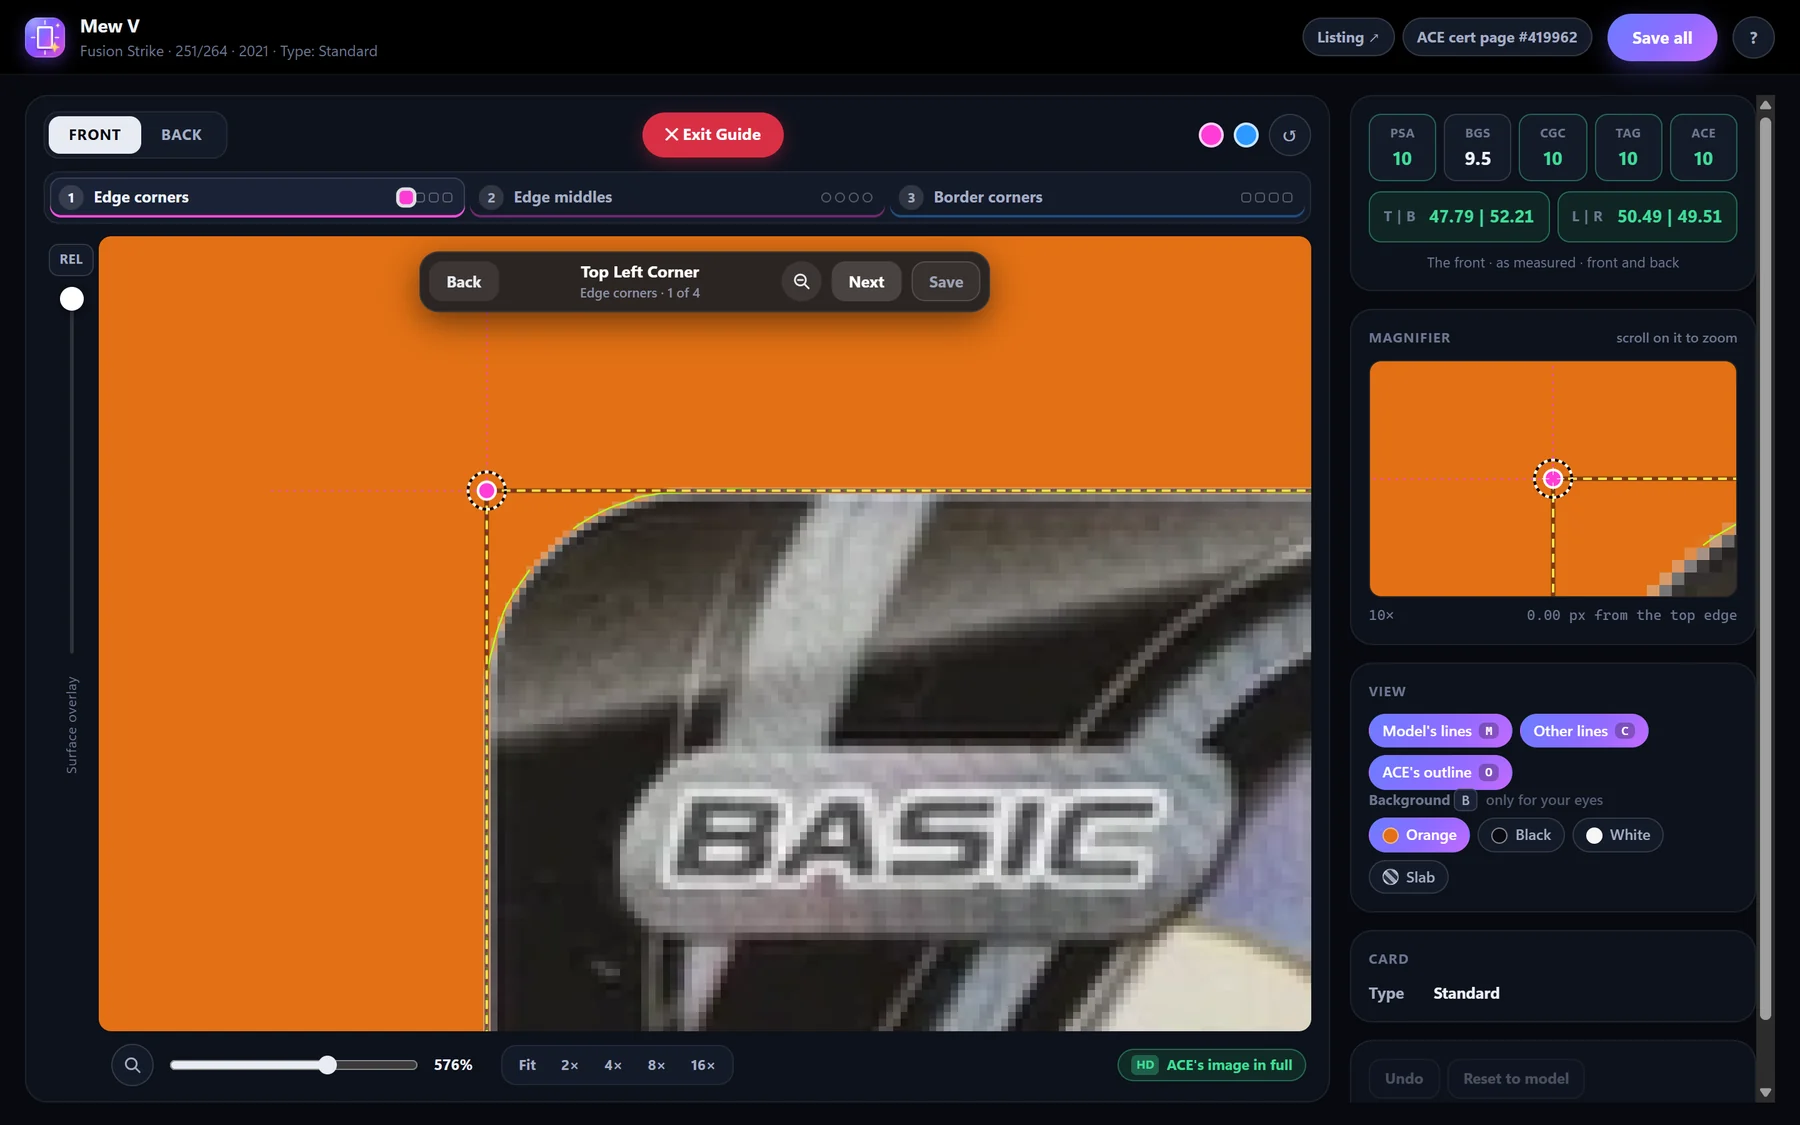
Zoom with the slider or your mouse wheel. The magnifier on the right shows the spot close up. The background colour is only there to help your eyes: it changes nothing.
Front and back
Use Front / Back at the top left to do the back too.
Save
Save all at the top right keeps everything. The panel then shows Your lines and uses them for your verdict. Changed your mind? Reset to model puts the measured lines back.